Dear Yarbo Family,
With the upcoming release of Firmware 3.10.0 and App Version 3.16.0, we know many of you are eager to learn more about the exciting new features and improvements. Below is a detailed overview of the key highlights and optimizations included in this update.
¶ Precise Positioning Vision System (Dead Reckoning)
We’ve added Dead Reckoning (DR) to help Yarbo keep working when GPS isn’t stable — like under trees, near walls, or along the eaves of your house. With DR on, Yarbo uses its internal sensors (IMU + odometer) to estimate its position, just like Google Maps still shows your car moving when you drive through a tunnel.
¶ How to Check Signal Quality
On the Diagnosis Page, you’ll now see a Quality Score (0–1) and new GPS colors:
- 🟢 Green = Strong GPS (Quality > 0.5) → Normal GPS mode
- 🟠 Orange = Medium GPS (Quality < 0.5) → Yarbo switches to DR mode
- 🔴 Red = No GPS or DR ran too far → Yarbo stops for safety
Some users may feel GPS seems “worse.” In fact, we raised the standard —the bad signals are no longer accepted, so Yarbo pauses instead of drifting off-course. DR fills those gaps.
- DR Default Distance Settings
- This is how far Yarbo can keep moving without GPS before it must stop by default:
- Drawing Travel Distance (Mapping): 5 m (≈16 ft)
- In-Area (Working Area) Travel Distance: 50 m (≈164 ft)
- Boundary Travel Distance (applies to Pathways, Dead-Ends, Boundaries, or Sidewalks): 10 m (≈33 ft)
You can adjust this in: App → Yarbo Lab → PPVS → DR Travel Distance Parameters
By default, DR is ON with these values.
¶ How to Adjust (with Examples)
- If Yarbo stops too often (e.g. under trees in the middle of the yard, it pauses every few minutes even though it’s safe): → Raise the In-Area Travel Distance slightly above the default (e.g. 164 ft → 200 ft).
- If Yarbo goes out of bounds or into NGZs (e.g. when mowing near flowerbeds or sidewalks, Yarbo may keep moving a little far and cross over the boundary): → Lower the Boundary Travel Distance below the default (e.g. 33 ft → 20 ft).
- If mapping keeps breaking (e.g. drawing a new map under trees and it stops every few steps): → Increase Drawing Travel Distance limit (5 m → 10 m / 16 ft → 33 ft).
Tip: When Yarbo works near sensitive areas like pools or cliffs, keep the travel distance set low. Higher values let Yarbo continue longer without GPS, which can be unsafe in such environments.
¶ Quick Example
Large open lawn with scattered trees: Increase the In-Area Travel Distance → Yarbo keeps mowing smoothly without pausing too often.
Yards with flowerbeds (NGZs) close to the boundary: Lower the Boundary Travel Distance slightly. This way, if the GPS signal fluctuates, Yarbo will pause earlier rather than “taking a few extra steps” in the tight space.
This feature is still in beta. In the beginning, we recommend monitoring Yarbo closely and adjusting the DR settings step by step to find the parameters that work best for your own yard. If you notice that Yarbo consistently goes out of bounds in a certain area and the Quality score stays below 0.5, we recommend avoiding that section for now. To address such cases, we are working on visual navigation, which will gradually improve accuracy in GPS-challenged areas while ensuring safety.
¶ Notification Optimization
We’ve optimized the notification system to deliver notifications more accurately and on time. You can now view your full notification history by going to the User Center and clicking the bell icon in the top-right corner.
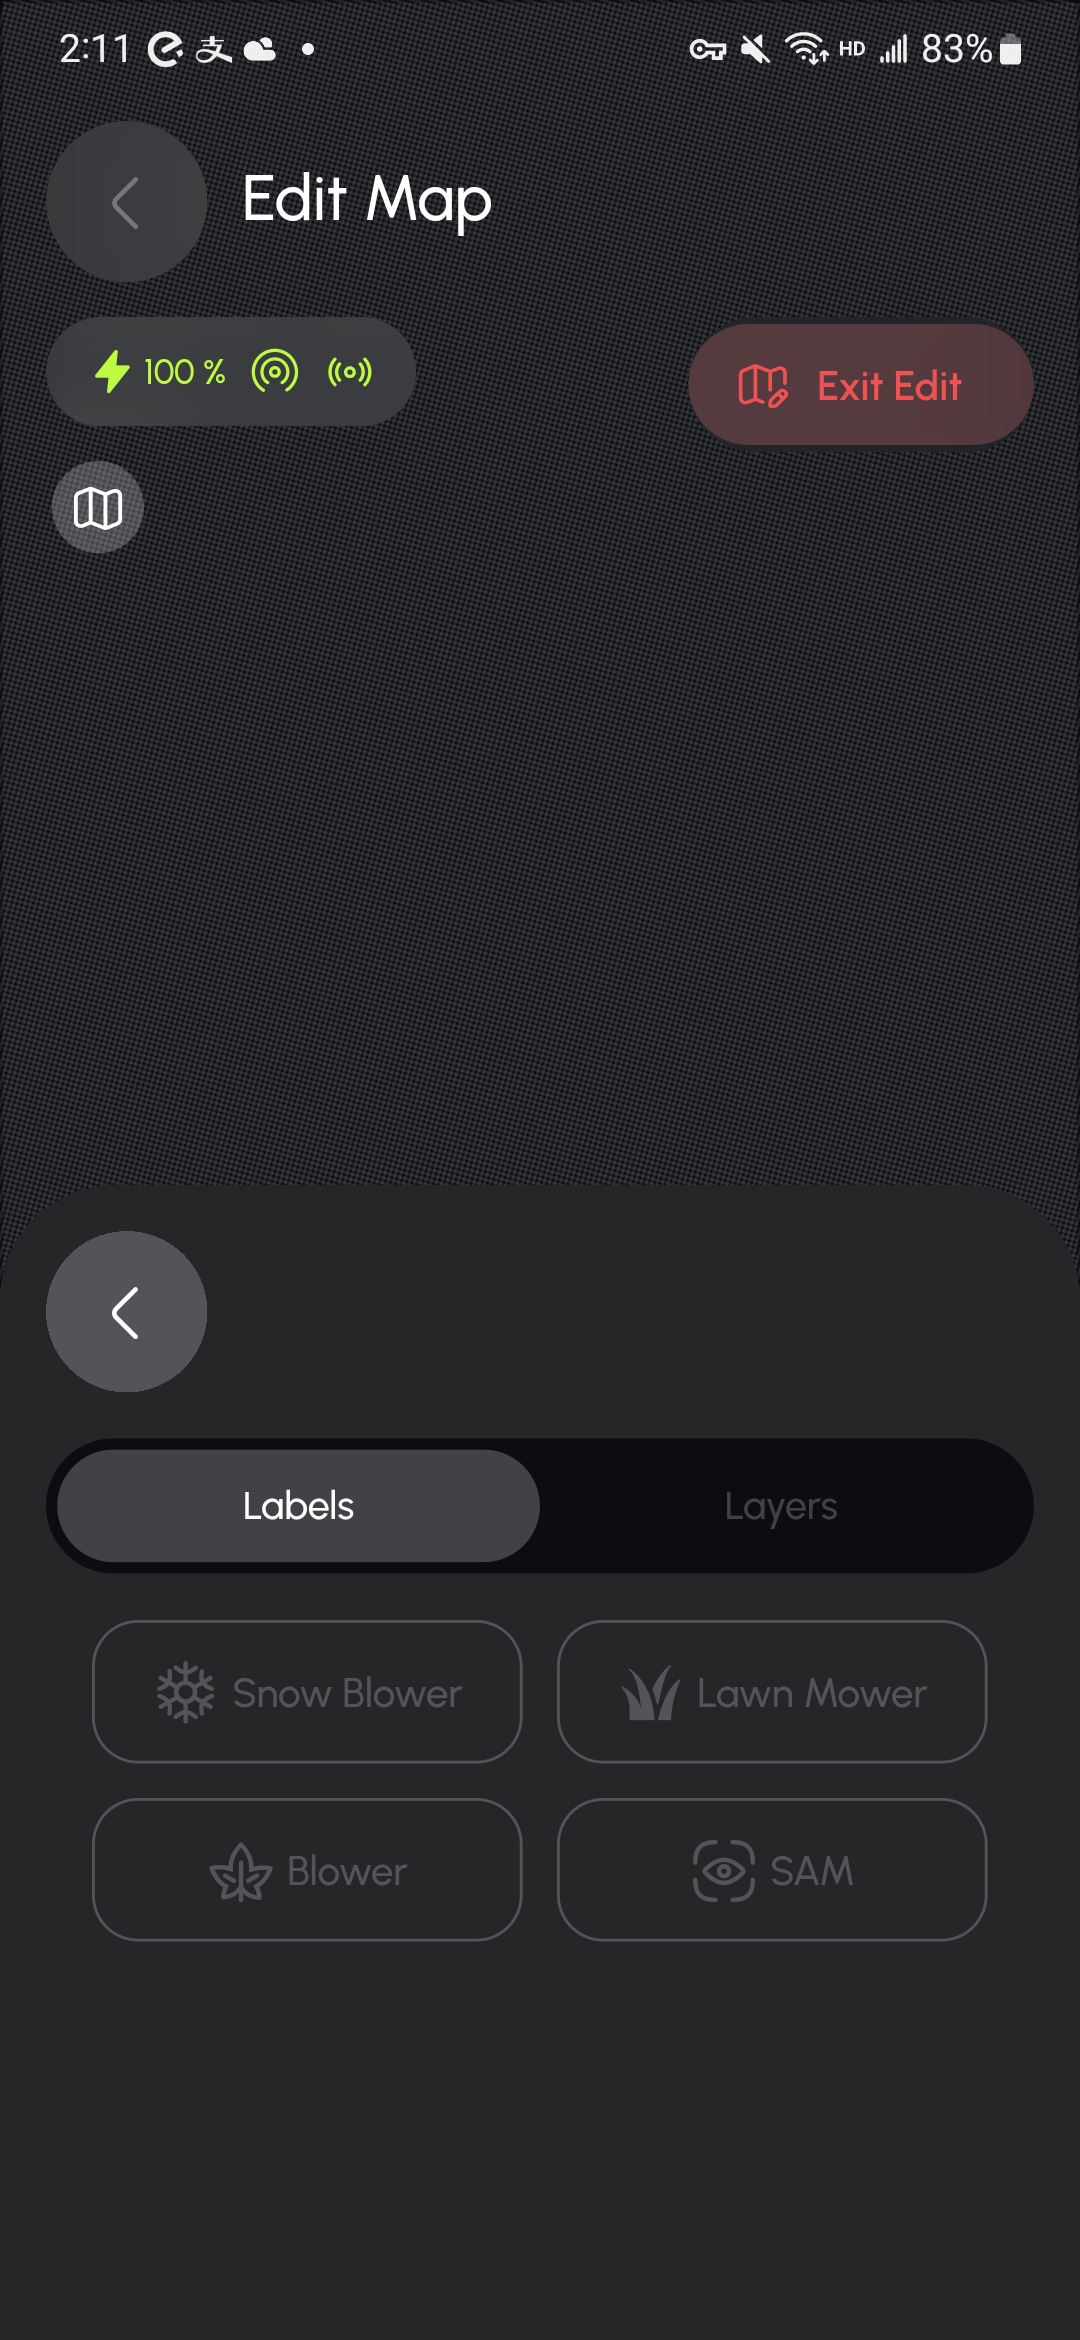
¶ Function Labels for Areas
You can now assign function labels (such as Lawn Mower, Snow Blower, Blower, and SAM) when creating or editing areas. Multiple labels can be applied to a single area.
Additionally, you can choose to view the map filtered by specific function labels, or see an overview of all mapped areas at once.
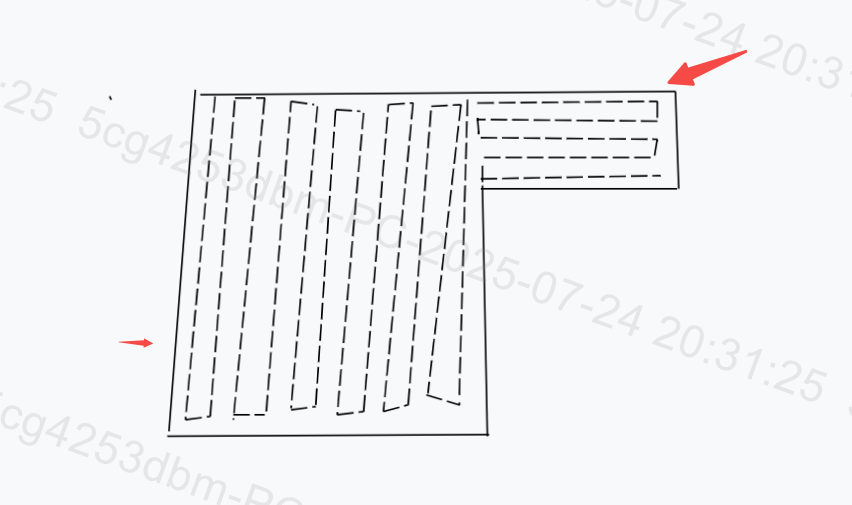
¶ Adaptive Route Mode
The Adaptive Route Mode has been introduced to provide more flexible area routing options.
To enable it, go to Area Settings and switch the route pattern to Adaptive Route Mode.
When selected:
- The Yarbo Lawn Mower will automatically choose the nearest starting point to begin mowing.
- Instead of mowing around each no-go zone perimeter separately, it will mow the perimeter of a no-go zone when it naturally reaches it along the set route.
- Reduces unnecessary travel lines that cut across an area.
- Minimizes lawn wear by applying adaptive routes that reduce frequent turns in narrow spaces.
¶ Physical Controller Optimization
Two major improvements have been made to the physical controller:
- Using the physical controller, joystick movement is proportional to speed — the farther you push, the faster the unit moves within the selected slow/fast level.
- The control area on the driving pad for straight-line operation has been enlarged for easier handling.
¶ Auto Light Mode (Lawn Mower)
- When enabled, the mower will automatically adjust its lights based on the surrounding brightness during a work plan.
- When disabled, the mower will maintain the light settings you configured manually.
- You can find the toggle under: Yarbo App → Settings → Work Preferences → Auto Light Mode
Note: Due to current limitations, if Auto Light Mode is enabled and the mower automatically turns the lights on in low-light conditions, the lights will remain on even if the environment later becomes brighter.
¶ Mower Pro: Pathway Obstacle Avoidance (Beta)
In the pathway settings, you can choose whether to enable vision detection and ultrasonic detection for Mower Pro.
.png)
¶ Plan List Improvements
In the Work Plan → Plan List section, you can now reorder your plans by simply long-pressing and dragging them to your preferred order. Once adjusted, the new order will be saved automatically. When you open any plan, you’ll also see the last work date for better tracking and planning.
.png) |
.png) |
¶ Cloud Backup for Latest Map
- The latest map adjustment from your Yarbo will be automatically backed up and securely uploaded to the cloud.
- Each unit will retain only one map version in the cloud at any given time.
- You can view and recover map data linked to your Yarbo by selecting the corresponding Serial Number (SN) in the app.
¶ Firmware Updates Option
When new firmware is available, the Yarbo app will display an update notification. You can then choose from the following options:
- Update Now: Begin the firmware update immediately, with a progress bar displayed in real time.
- Update Overnight: Schedule the update to run automatically between 2:00 AM and 5:00 AM.
- Update Next Time: Skip the current update and defer it until the next release.
¶ New Return Modes for Mowing and Snow Blowing Schedules
In the schedule settings for the lawn mower and snow blower, you can now choose between two return modes:
- Return at Set Time Yarbo will return to the docking station as soon as the scheduled end time is reached, regardless of task progress.
- Return After Completion Yarbo will complete the entire task before returning to the docking station, even if it goes beyond the scheduled end time.
How to set return modes:
- Tap "Enter My Yard" on the home screen.
- Tap the button to the right of Start to open Schedule settings.
- Choose your preferred return mode in the schedule settings.
Note: The return mode can also be modified at any time during an active task for added flexibility.
.png)
¶ Wiki Quick Access
A dedicated Wiki platform is now accessible directly from the Profile section in the Yarbo app. Through Yarbo Wiki, you can explore a comprehensive library of FAQs, how-to guides, and product information to help you quickly find answers and solutions —— save your time and enhance your experience.
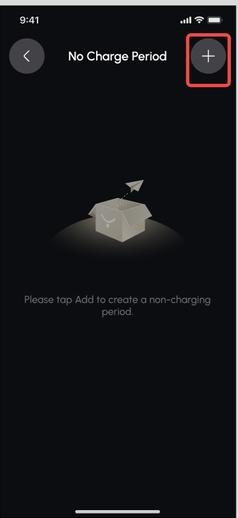
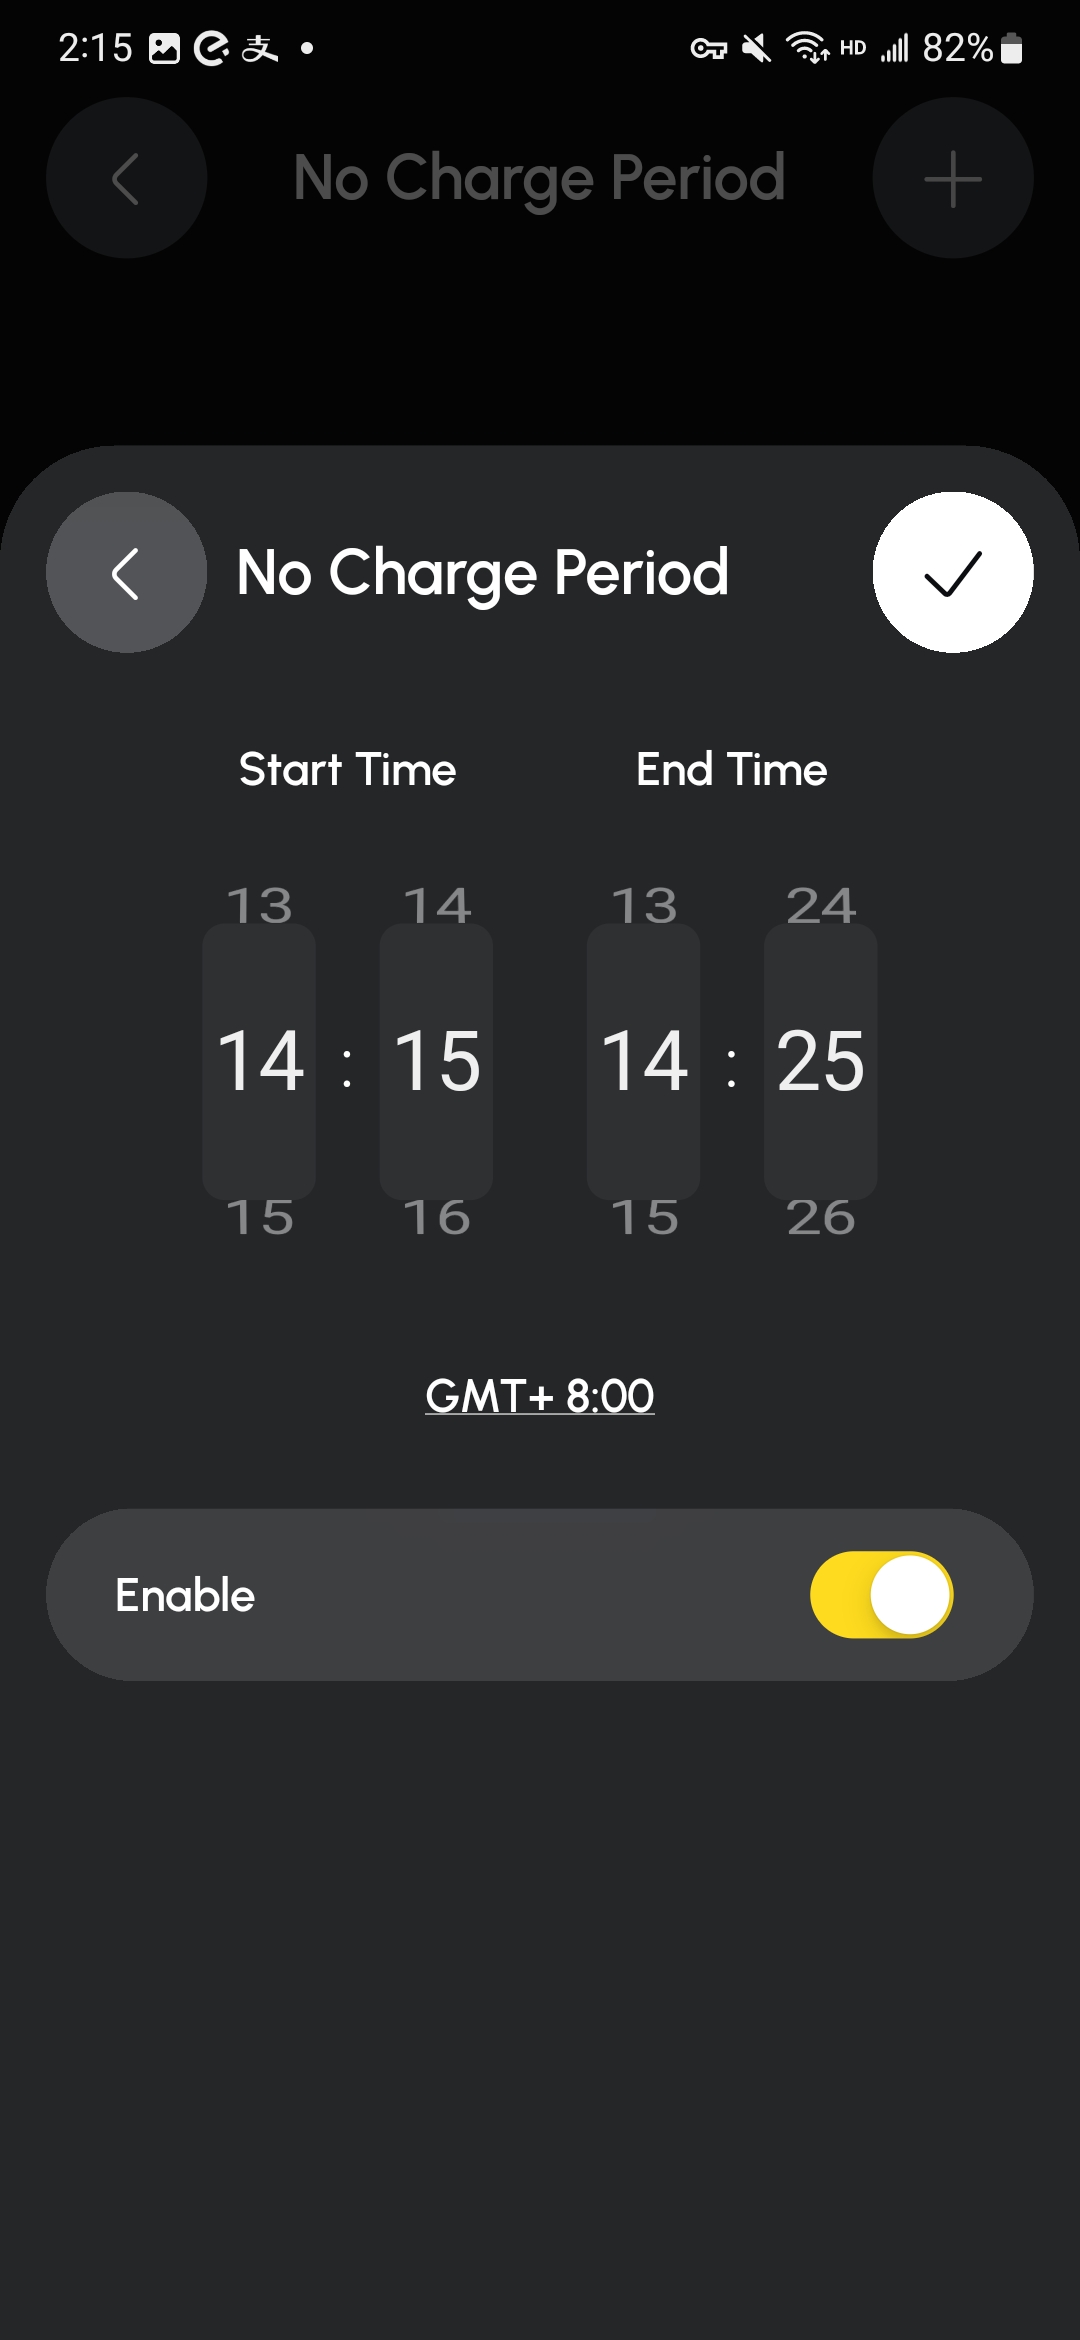
¶ No Charge Period
You can set daily No Charge Period in the app (e.g., 17:00–20:00). The minimum interval is 10 minutes, and the feature is disabled by default.
How to Set A No Charge Period?
- Open the Settings page in the app.
- Navigate to Work Preferences → No Charge Period.
- Tap the “+” icon in the top-right corner to set up your desired time periods.
- Tap the “√” in the upper-right corner to save your settings.
.png) |
||
 |
 |
Note:
If the Yarbo’s battery drops to 10% or below, it will automatically trigger emergency charging, restoring the battery to 30% before stopping.
After the non-charging period ends, the device will automatically resume charging.
If you manually trigger charging during a non-charging period, a pop-up notification will ask for confirmation to proceed.
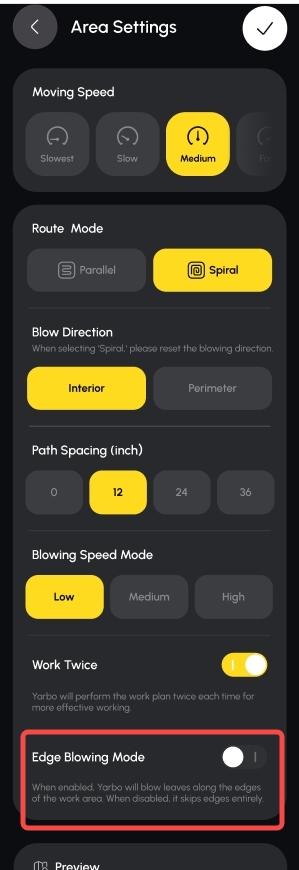
¶ Edge Blowing Toggle (Blower)
You can now control the edge-blowing function using a toggle. It is enabled by default for all zones. When turned off, the blower will skip edge-blowing actions.
Note: The toggle cannot be adjusted while a work plan is in progress, paused, or when Yarbo is returning for recharging.